I am sure you have already used the Power Automate Excel component, it works fine for small Excel, but when it comes to export a whole table with thousands of line, it takes a very long time, result isn’t quite expecting and after a couple month, you won’t export anything anymore.
The thing is, why in Dataverse Model Driven App, when I click on Export it take me a second? Why can’t it be the same with Power Automate? This is what we are going to find out in this post.
It works only with Dataverse Table, not SharePoint!
1. The request behind Export to Excel in Model driven
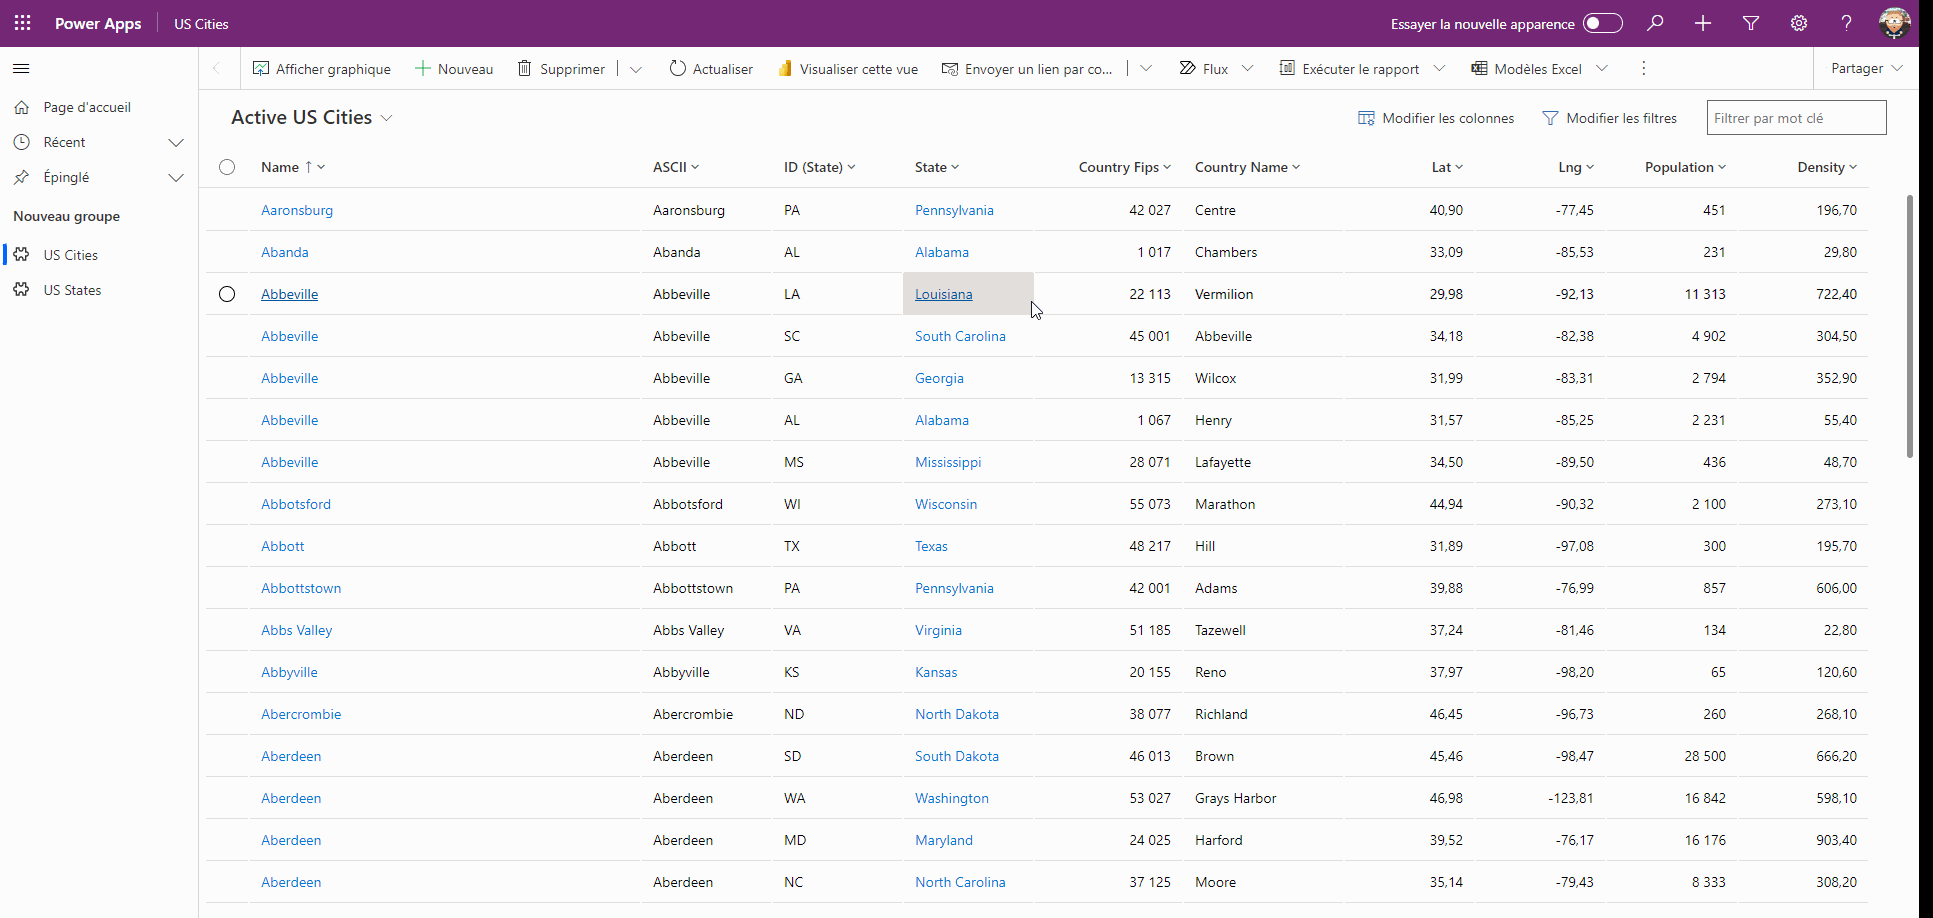
For the demo, I have created a table with all US Cities, data can be found at https://simplemaps.com/data/us-cities.
I have made a Table with the states and another one with the cities, which contains a lookup to States.
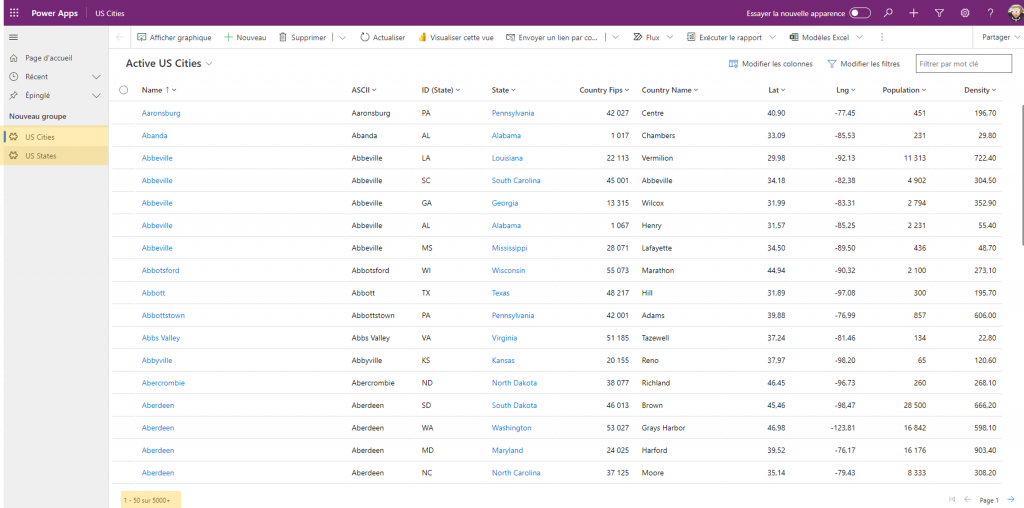
As you can see, there are 5000+ elements in my table. More than 30k cities.
However, if I click on Export to Excel, it is going to take few second to have all my data into an Excel file. And not hours compare with the Excel Power Automate component.
So what’s going on to have your Excel file so fast?
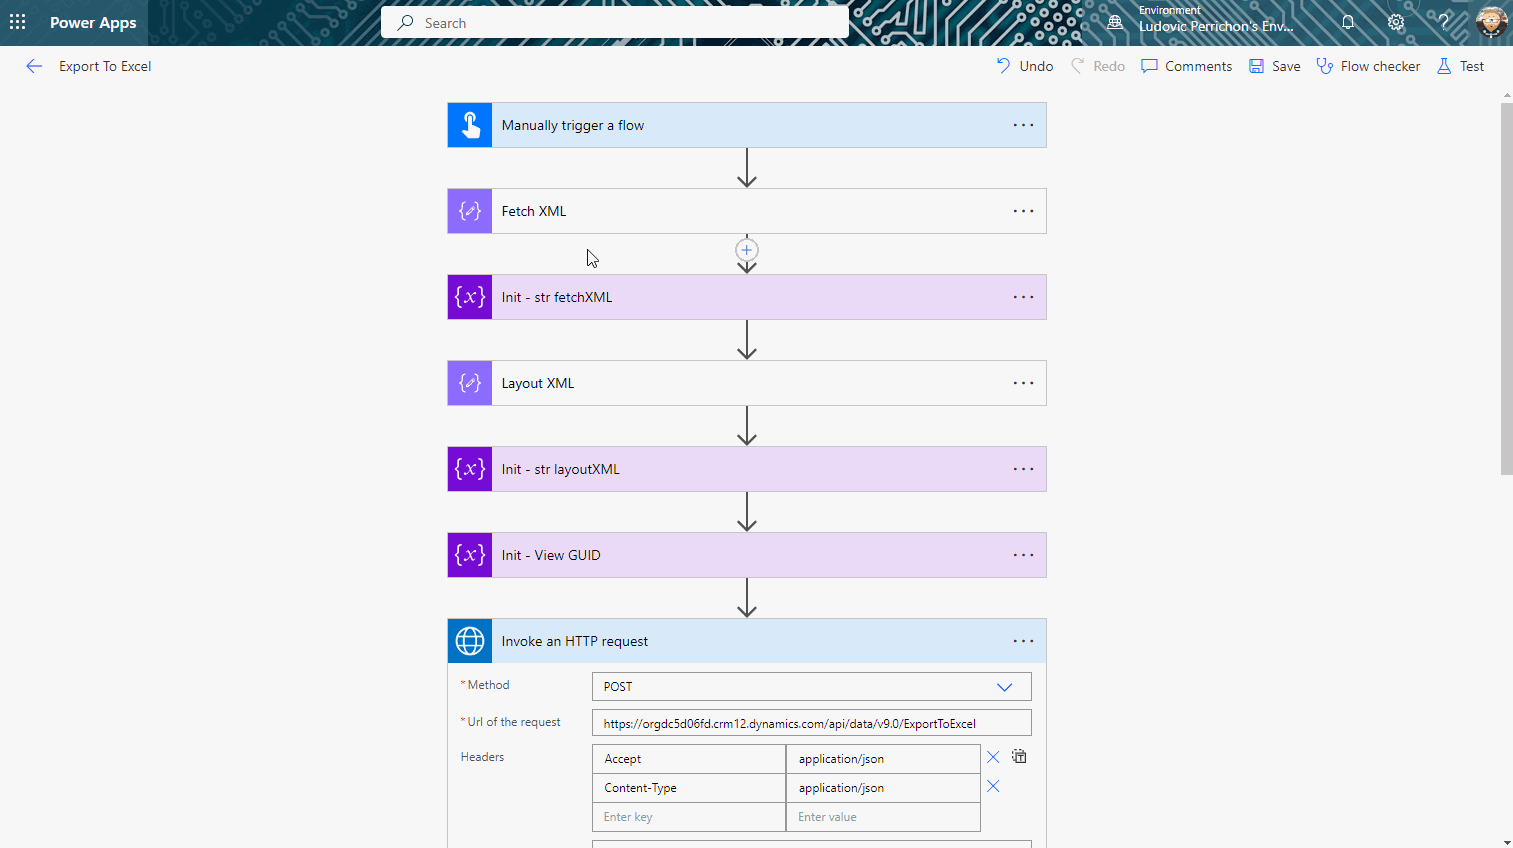
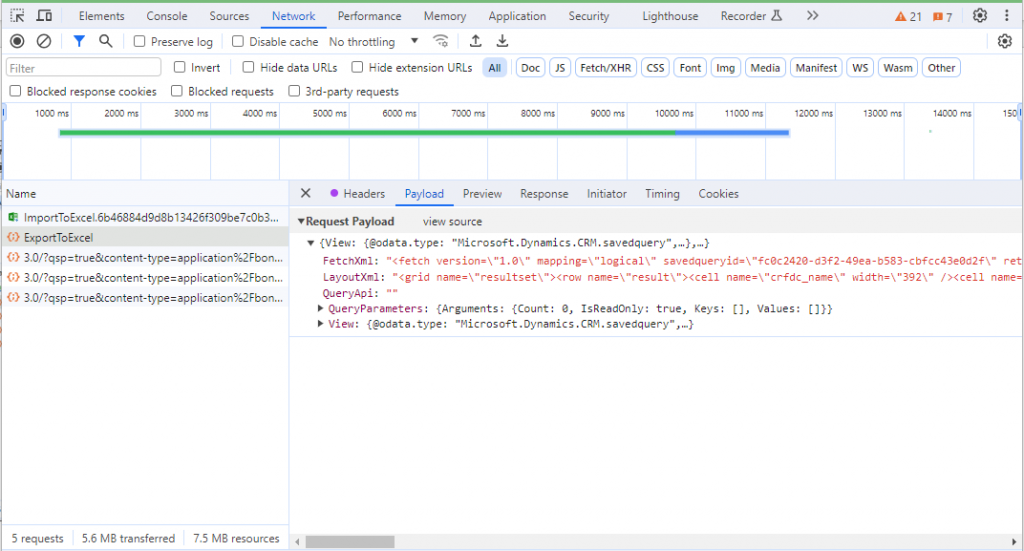
If you catch what’s going on, you are going to find a call to Dataverse API, ExportToExcel method.
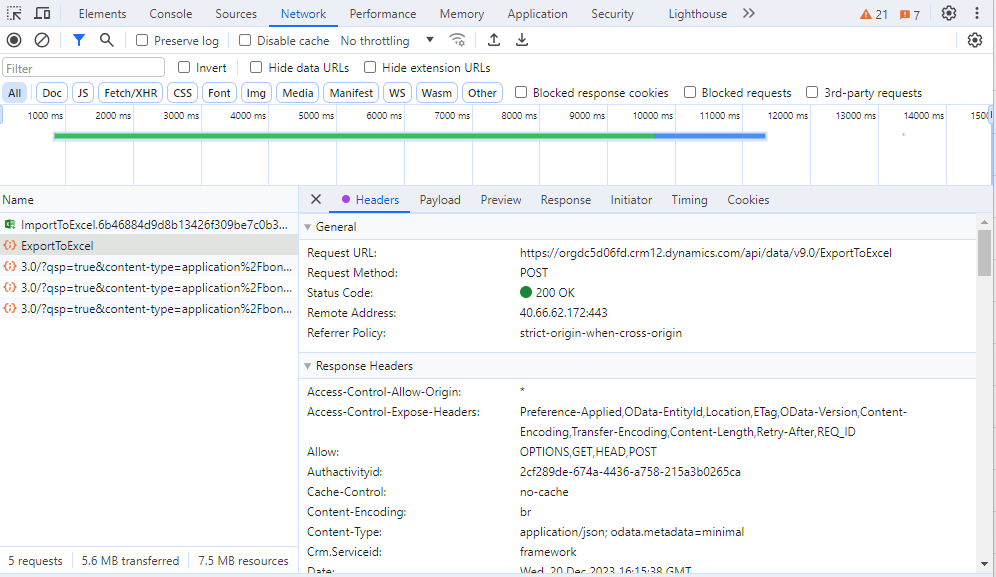
It sends as parameters:
- Fetch XML which returns the data from trable
- LayoutXML which set our Excel file columns:
Fetch XML in my demo case:
<fetch version="1.0" mapping="logical" savedqueryid="[[VIEW GUID]]" returntotalrecordcount="true" no-lock="false">
	<entity name="crfdc_us_city">
		<attribute name="crfdc_us_cityid"/>
		<attribute name="crfdc_name"/>
		<order attribute="crfdc_name" descending="false"/>
		<filter type="and">
			<condition attribute="statecode" operator="eq" value="0"/>
		</filter>
		<attribute name="crfdc_ascii"/>
		<attribute name="crfdc_state"/>
		<link-entity alias="a_e68337ae423543ed828776a450b94575" name="crfdc_us_state" to="crfdc_state" from="crfdc_us_stateid" link-type="outer" visible="false">
			<attribute name="crfdc_id"/>
		</link-entity>
		<attribute name="crfdc_country_fips"/>
		<attribute name="crfdc_country_name"/>
		<attribute name="crfdc_lat"/>
		<attribute name="crfdc_lng"/>
		<attribute name="crfdc_population"/>
		<attribute name="crfdc_density"/>
	</entity>
</fetch>
Layout XML in my demo case:
<grid name="resultset">
	<row name="result">
		<cell name="crfdc_name" width="392"/>
		<cell name="crfdc_ascii" width="131"/>
		<cell name="a_e68337ae423543ed828776a450b94575.crfdc_id" width="131"/>
		<cell name="crfdc_state" width="131"/>
		<cell name="crfdc_country_fips" width="149"/>
		<cell name="crfdc_country_name" width="161"/>
		<cell name="crfdc_lat" width="131"/>
		<cell name="crfdc_lng" width="131"/>
		<cell name="crfdc_population" width="132"/>
		<cell name="crfdc_density" width="131"/>
	</row>
</grid>
So the Layout XML means which columns you want to display, and you can give it a width. Be careful to related column, it is using an alias, see Fetch XML.
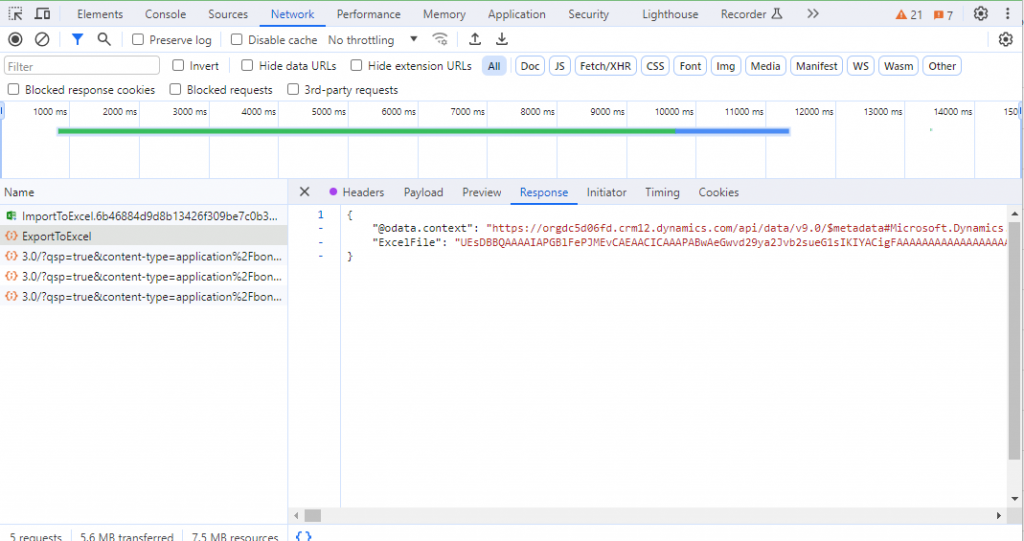
And then, the response of this API Call is the Excel file itself:
2. Reproduce Export to Excel in Power Automate
The idea is to do the API call from Dataverse, method ExportToExcel in Power Automate, and then create a file somewhere (in our case, One drive).
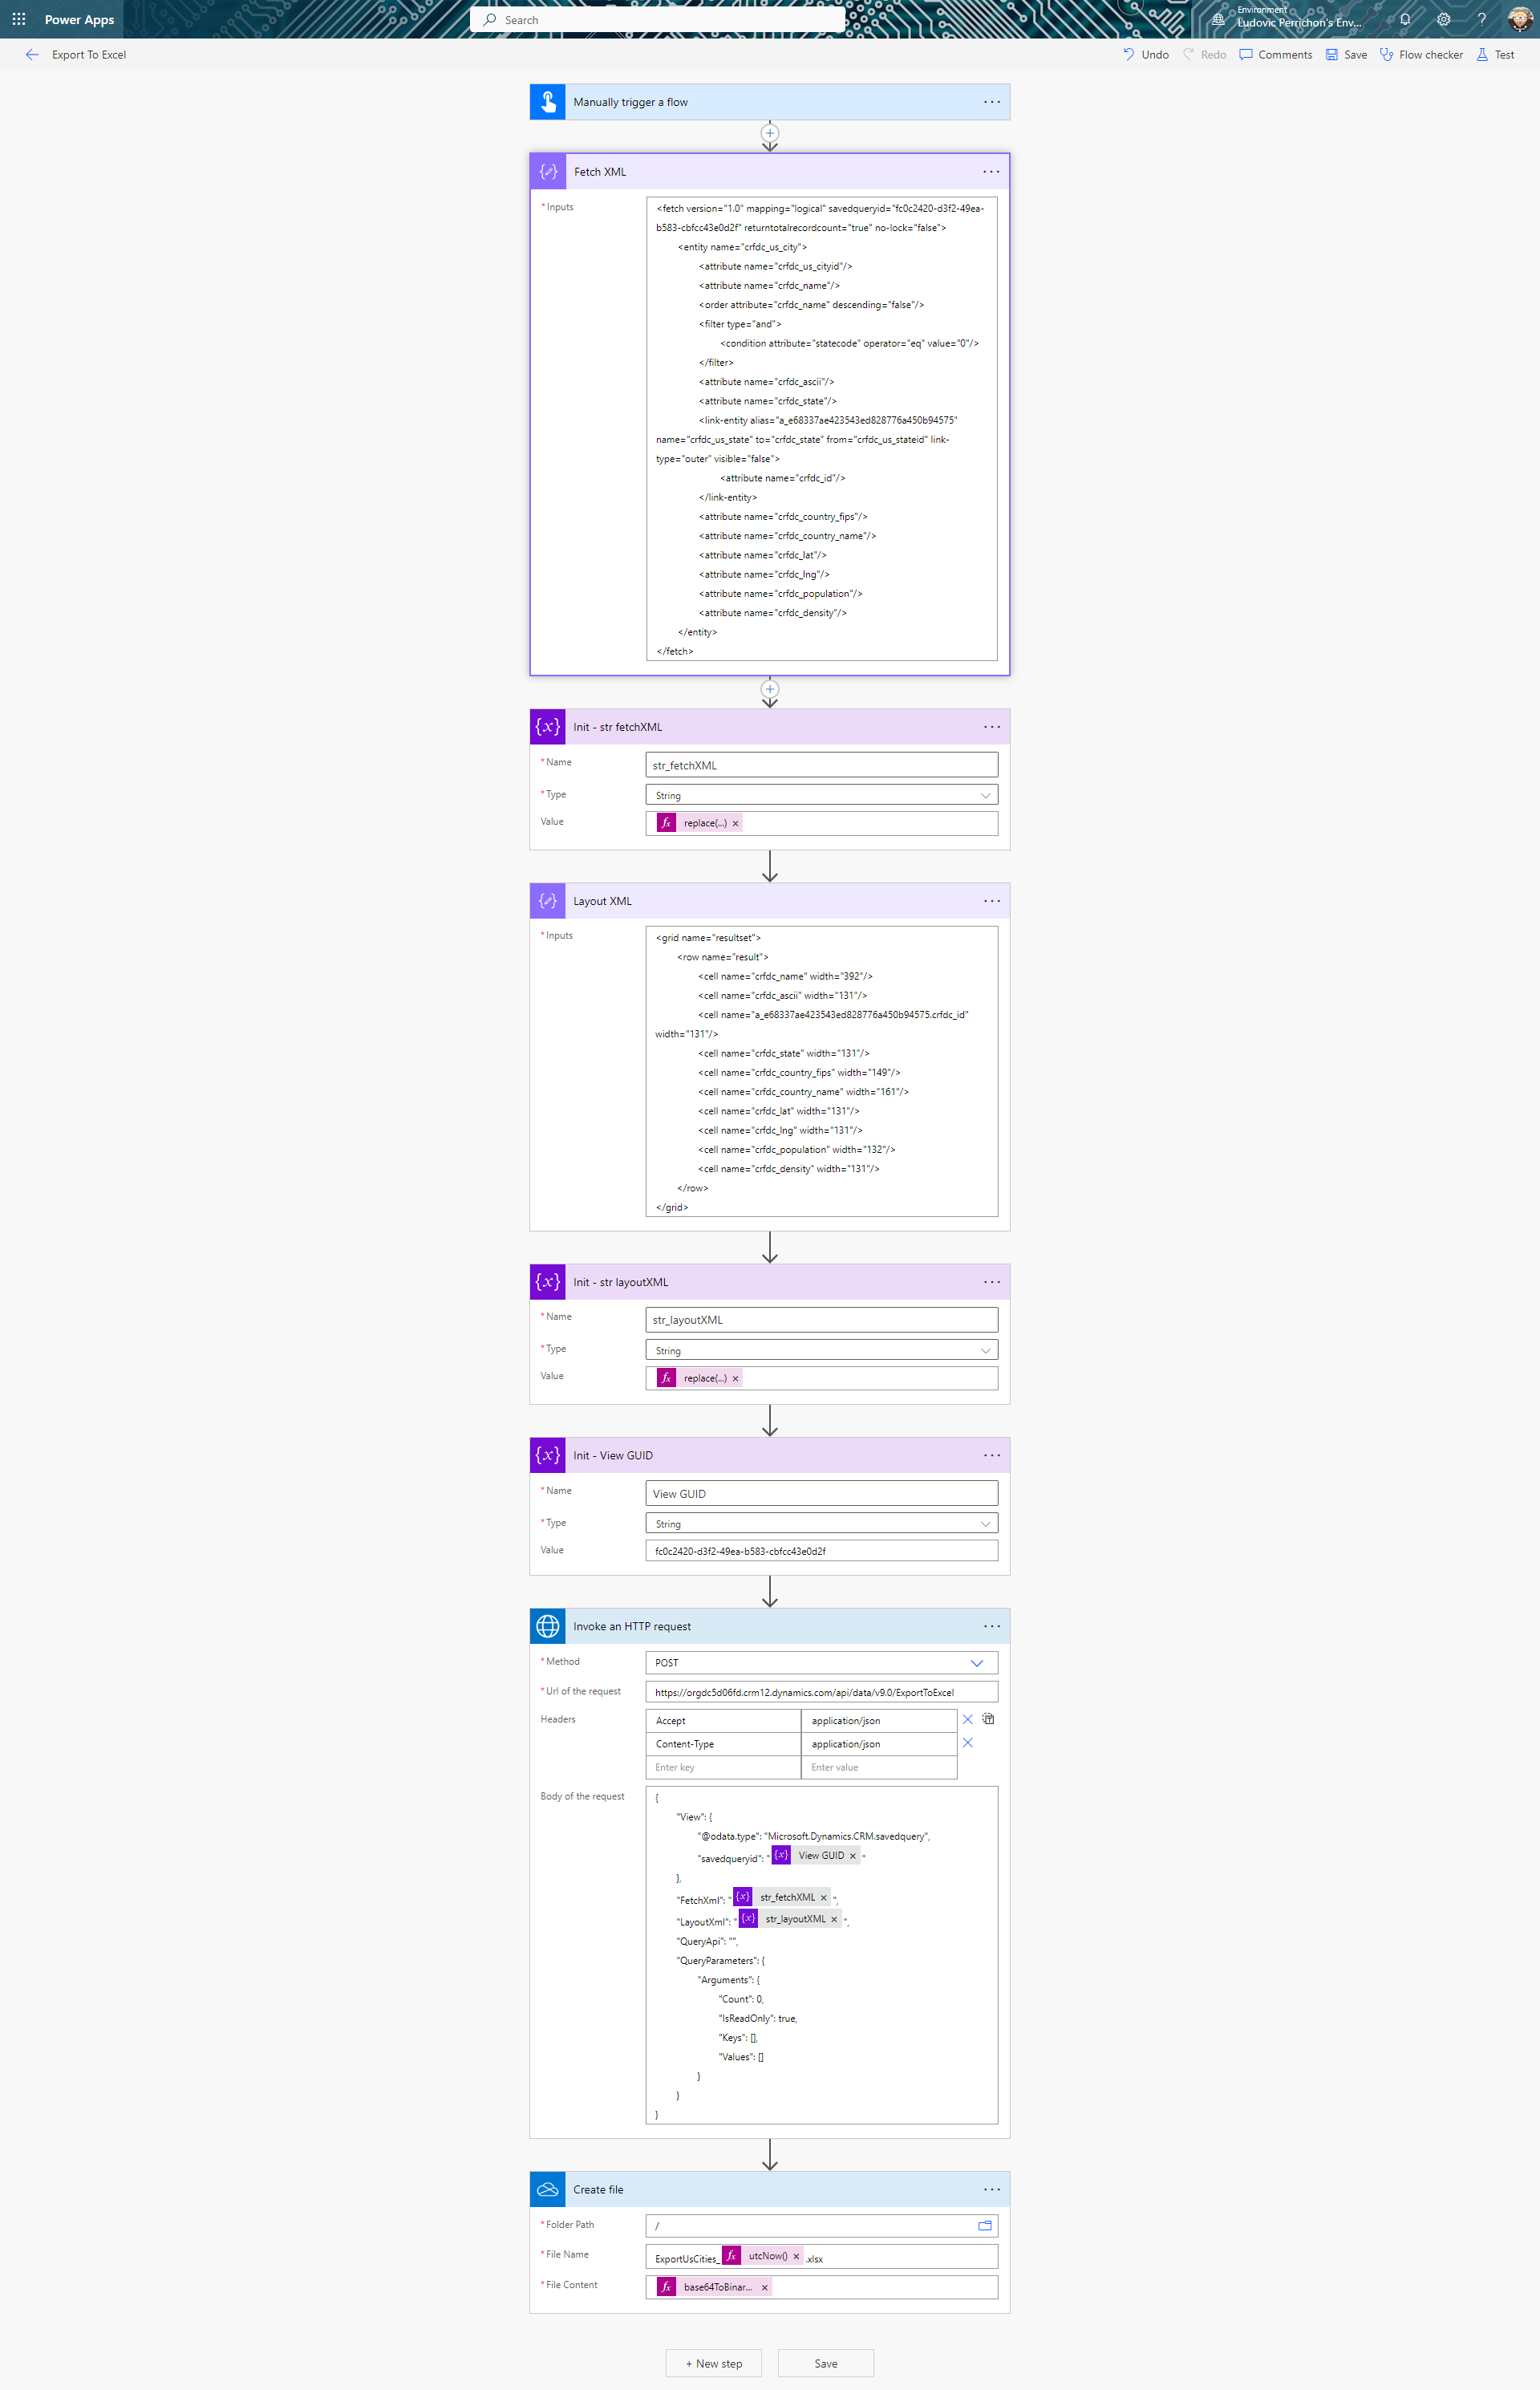
I am initializing my Layout XML and Fetch XML variables by escaping all double quote.
replace(outputs('Fetch_XML'),'"','\"')
replace(outputs('Layout_XML'),'"','\"')
Then I am building my request to the Dataverse API.
And I am converting the response from base64 to binary to create my file.
base64ToBinary(outputs('Invoke_an_HTTP_request')?['body']?['ExcelFIle'])
Here is the demo: